Building the new Home

A webpage dedicated to building our new home, new construction, by Forino builders in Douglassville, PA. From framing to drywall to moving in. We'll hopefully capture every step by step process to building a new home.

Name:
Location: Limerick, Pennsylvania, United States

Thursday, December 31, 2009

Wedding Pictures Link

Tuesday, July 15, 2008

Link to recent pics of the theater room and issues with the master bath

http://s110.photobucket.com/albums/n105/johnnyq627/house/

Monday, January 21, 2008

Screen wall up and some painting

Photobucket

Photobucket

Photobucket

Photobucket

Photobucket

Photobucket

Wednesday, November 28, 2007

Drywall is up!

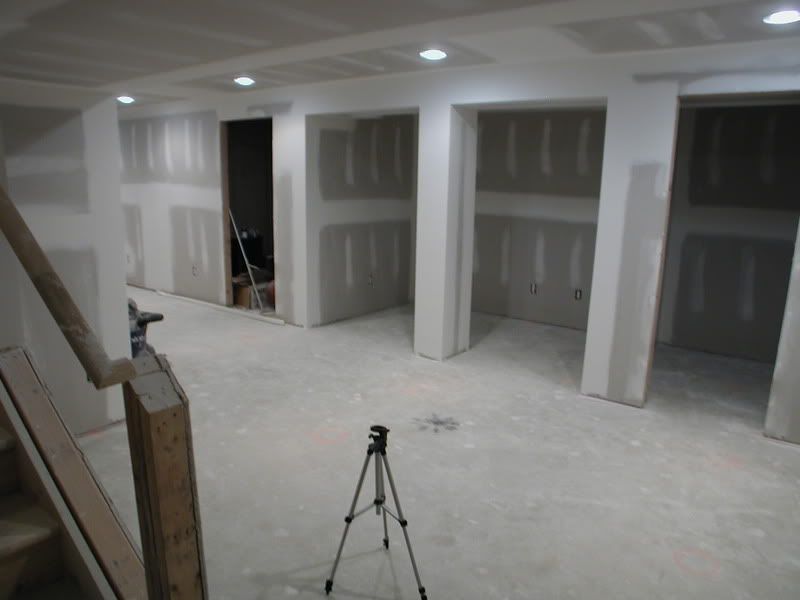
Ok I got all of the pictures uploaded.... here is a walkthrough from the stairs down into the basement to the theater:

Coming down the stairs and taking a left. To the right is the wine closet. Then there is a 10'x5' space with a column in the middle. This was originally going to be the bar area, but then I decided I wanted it closer to the theater/bathroom, so now I have no idea what to do with this awkward space... maybe two pinball machines? Then next to that is the hot water heater room.


On the other side is the furnace room and what will probably make into a small reading area.


Continuing through the basement is where the pool talbe will be (under the lower ceiling). There are four lights against the far left wall that will be used to light up posters on the wall. I would really like some cool animation pictures, maybe bleach, naruto, dragonballz and one other... but the gf may not approve and I might have to go with movie posters :) .


On the other side is the sump pump closet and the bilco stairs.


A little farther down on the left is the hallway to the theater/bathroom and the bar area. The purple area is where there will be a wet sink and maybe a small fridge. The opening for the electrical panel will be covered with a hinged picture of some sort.


Looking down the theater hallway, the bathroom is a few feet on the right, the theater is at the end on the left. Straight ahead is a wall plug for a lighted poster frame or a now playing marquee or a lighted ticket window, not sure which yet.


Here is the entrance to the theater


The rear of the theater


Entering the equipment closet


And here are a few different light settings using the grafikeye


There are light zones missing for now, there will be a rope light around the soffit, lights shining on the screen, lights inside the columns, and lights behind the smx screen to light up the speakers.

Nick

Insulation In

Ok it's been too long since I last posted. The little things here and there took way too long. The electrical took much longer than I would have ever thought!

I had to figure out what to do on the stairs leading down to the basement. I ended up studding them with 1x3s and foam in between.


We got the insulation up, that was NOT a fun job


This is the outside of the theater wall, it shows the weave of the insulation and the eyeball lights that will be shining on pictures against the wall


A lot of wires in the equipment closet!


And finally some pics of the theater

Looking at the front of the room


We got four estimates on drywall, one was astronimical, two were in the 6k range and one was in the 4k range (and was the company that drywalled the rest of our house when it was built)... we went with the 4k route :)

Nick

Tuesday, July 31, 2007

Electrical Progress

Work in the basement is coming along slowly. With fishing on weekends and softball/class on weekdays, I've only been able to get a couple of hours in each week. Most of the work has been for the electrical in the basement. I've installed over 50 outlets, 10 switches, and 1000+ feet of 20awg wire.

I managed to get the bathroom vent installed. Here is the picture of the light/fan and the insulated ductwork heading into the storage area where it then goes under the beams and up to the hole through the outside wall. The hole in the outside wall took 4 days to drill. I used a 4" hole saw and my battery operated drill would only last for about 2 mins of heavy drilling before dying. The outside wall was 3" thick engineered plywood and there was one engineered joist I had to go through as well. It made me nervous cutting that large of a hole in the side of the house, but it had to be done!

Photo Sharing and Video Hosting at Photobucket


Here is the vent I put on the outside of the house. This is with the fan off. You can see that it closes itself to stop water from getting in and AC/Heat from getting out.

Photo Sharing and Video Hosting at Photobucket


Once the fan turns on, the vents open nicely. This vent wasn't absolutely necessary since it's only a powder room, but it will be nice not to have to smell people going to the bathroom from other parts of the house. Plus if we ever decide to make it a full bath, the vent will already be there.

Photo Sharing and Video Hosting at Photobucket


Here are the three switches for the bathroom, one for the light above the sink, one for the light in the ceiling and one for the fan in the ceiling. I hooked them to the breaker last night and everything worked well. You can see two of the outelts for the powderoom on the floor as well. All power in the bathroom is on a GFCI breaker.

Photo Sharing and Video Hosting at Photobucket


Here is the light box for where the future light above the sink will go. It's taped off for now. I ran 12/3 here so that I could tie off and run to the outlet on the side of the sink. This was much easier than running wire from the outlets on the other side of the bathroom, plus I had extra 12/3 laying around.

Photo Sharing and Video Hosting at Photobucket


Here is some of the wiring that was done in the front of the theater. It's certainitly not my nicest work, but I wanted to leave a bit of slack in case some of the outlets ever need to be moved. The top three outlets are hooked to the grafikeye and will be used to control lights behind the movie screen to create a "see through" screen so that you can see the speakers behind the screen. The bottom three outlets will be used by the subwoofers.

Photo Sharing and Video Hosting at Photobucket


I got my a/v cables from monoprice.com this week. I ran one of the 25' component cables from the equipment closet to the projector to make sure it was long enough. Here you can see where the cables will be in the equipment closet.

Photo Sharing and Video Hosting at Photobucket


Here is where the a/v cables exit the soffit for the projector. You can also see the pvc I ran. This is in case 2 years down the road there's a new technology type of cable that I need to run. It will make it really easy to run a new cable to the projector.

Photo Sharing and Video Hosting at Photobucket


This is the soffit opening opposite the side where the a/v cables come in. I moved the receptacle over to this side so that the power wouldn't interfere with the video signals.

Photo Sharing and Video Hosting at Photobucket


Here's an up to date shot of the basement:

Photo Sharing and Video Hosting at Photobucket


I tore down part of the staircase wall to help open it up a bit. The railing will be replaced by a nice one with spindles once carpet and drywall is done. I'm hoping this makes it feel like another level to the house instead of a basement.

Photo Sharing and Video Hosting at Photobucket

Wednesday, June 06, 2007

Bedroom Pics

So I finally got around to painting the spare bedrooms. Here are a few pics until i can take better ones with the wide angle lens


Monday, June 04, 2007

More Electrical Work

I continued working on the elctrical over the last couple of weeks. I got all of the lights wired up (with the exception of the bathroom and arcade). All of the switches are dimmable and the wall wash, hallway to the theater, and bar lights can all be controlled via remote.

Here's a pic looking back towards the arcade/wine closet (on left) and entrance to the basement (right):

Photo Sharing and Video Hosting at Photobucket


Here is the same shot, but shows the lights in the lower ceiling area a bit better:

Photo Sharing and Video Hosting at Photobucket


Here is a shot looking the other way towards the theater hallway (left) and bar (center):

Photo Sharing and Video Hosting at Photobucket


Here is a good shot of the lights under the lowered ceiling. The main ceiling as 6" cans, the lowered ceiling has 5" on the left side and 4" on the ride side. The 4" will be wall washes:

Photo Sharing and Video Hosting at Photobucket


Here is the hallway to the theater:

Photo Sharing and Video Hosting at Photobucket


Here is the bar area. We plan on putting cabinets below the three lights. There will be enough room to walk behind them and there will be a small sink installed. I wired all the lights and outlet to a GFCI breaker and put all lights/outlets off a GFCI receptacle. I did manage to blow up the first switch I put in there. It was the last switch I installed, so you would think it would have been a no brainer, but for some reason I decided to hook the neutral to the output instead of the hot... a big zap and tripped breaker... a burnt $30 switch to be replaced and all is fine now:

Photo Sharing and Video Hosting at Photobucket


Here is the entrance to the theater. I ran out of bulbs, so I only have two of 4 installed in the main ceiling and three of 4 installed in the soffit:

Photo Sharing and Video Hosting at Photobucket


Here is the rear of the theater. On the right part of the soffit is the outlet for the future rope light. You can also make out the two outlets that will be located inide the columns:

Photo Sharing and Video Hosting at Photobucket


Here is the front of the theater. The outlet in the soffit above will be for lights that will shine down on the front of the screen. The three black outlets will be behind the screen and will be used to light up the speakers so that they can be seen through the screen when desired:

Photo Sharing and Video Hosting at Photobucket


I finally got my GrafikEye installed. This controls all the lights in the theater and it is simply awesome! I have 6 zones as follows:

#1 - 4 Main ceiling can lights
#2 - 4 Soffit lights
#3 - Screen lights
#4 - Rope light for soffit
#5 - Behind screen lights
#6 - Column lights

Photo Sharing and Video Hosting at Photobucket


The grafikeye has up to 25 scenes. These scenes are preset settings for the brightness of each zone. For instance, scene #1 could have zones 1 and 2 on and 3-6 off... scene #2 could have zone #1 dimmed 50%, zone #2 dimmed 75%, zone #4 dimmed 10% and the rest off, etc. It's very adaptable and can all be controlled via a remote. I played with it last night and it was really really cool!

Photo Sharing and Video Hosting at Photobucket


Lastly, here's each side of the theater. There are two outlets per side wired... these will be for inside the columns to control lights mounted on/in them. They are controlled by the grafikeye:

Photo Sharing and Video Hosting at Photobucket

Photo Sharing and Video Hosting at Photobucket

Nick